When it comes to woodworking tools, few spark as much debate as the Festool Domino machine. Some woodworkers swear by it, while others scoff at its hefty price tag. But what if I told you that you can achieve the same high-quality loose tenon joinery without spending over $1,000? In this article, we’ll dive into a method shared by Stumpy Nubs (James Hamilton) that uses a simple router jig to create perfect mortise and tenon joints. And the best part? It’s practically free if you already own a router!
Why Loose Tenon Joinery is a Game-Changer
Loose tenon joinery is a woodworking technique that’s faster and easier than traditional mortise and tenon methods. Instead of cutting a tenon on the end of one workpiece and fitting it into a mortise on another, you create separate tenons that fit into mortises on both pieces. This method is not only efficient but also incredibly strong. However, tools like the Festool Domino make this process seem out of reach for many due to their high cost. But as Stumpy Nubs shows, you don’t need an expensive machine to achieve professional results.
Building Your Router Jig: Step-by-Step Guide
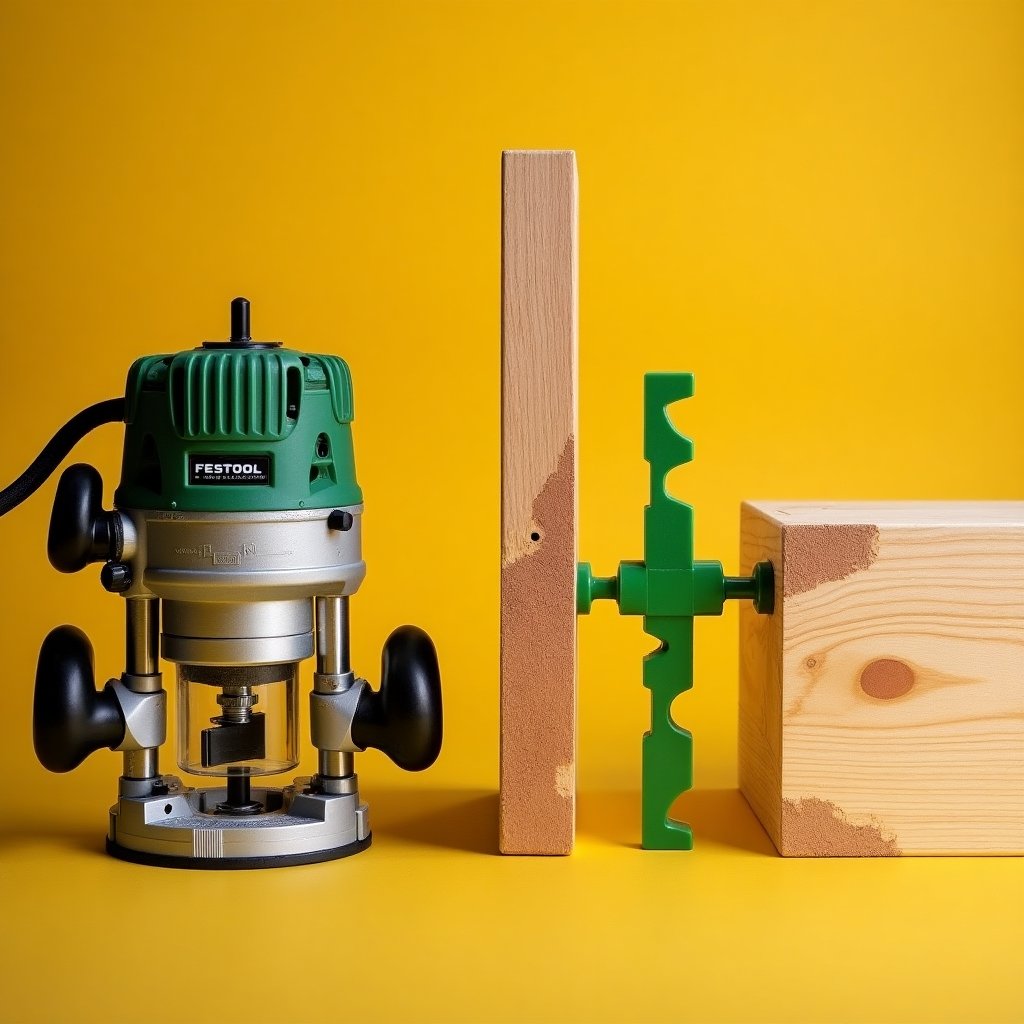
First, let’s talk about building the jig. You’ll need some scraps of plywood—larger pieces around 6-8 inches by 3-4 inches will work. The exact size isn’t critical, but the thin strips in the center are important. These strips should match the outer diameter of your router’s bushing. This ensures precision when cutting your mortises.
Next, determine the rough length of your mortise. This doesn’t have to be exact, but it should be shorter than the narrowest workpiece you’re using. Remember, the actual mortise will be slightly shorter than the slot in your jig due to the router bit’s offset. But don’t stress about exact measurements—woodworking is as much about feel as it is about numbers.
Now, attach a fence to your jig. While some woodworkers prefer adjustable fences for versatility, Stumpy Nubs recommends a fixed fence customized for each project. This ensures accuracy and simplifies the process. To create the fence, use a table saw to cut a shallow curve over a pencil line you’ve scribed on the jig plate. This ensures the fence is perfectly aligned with the mortise slot.
Once the fence is attached, your jig is ready to go. It’s a simple yet effective tool that will save you time and money.
Cutting Mortises Like a Pro
With your jig assembled, it’s time to cut some mortises. Start by laying your workpieces together as they’ll be assembled, with the show faces up. Draw lines across the center of each joint to help position the jig. Use a square to extend these lines around the edge where the mortise will be cut. This ensures everything stays aligned.
When positioning the jig, align the center line on the jig’s mortise slot with the central line on your workpiece. Clamp the jig in place, making sure the fence is on the outer show face of the workpiece. This ensures the mortise will be perfectly positioned.
For cutting the mortise, Stumpy Nubs recommends an upcut spiral router bit. This type of bit pulls chips up and out of the mortise, keeping the bit cool and extending its lifespan. Take several shallow passes, going about 1/4 inch deeper with each one. If you encounter vibration, switch to plunging the bit repeatedly to bore a series of holes down the length of the mortise. This method is especially effective for deep mortises.
Creating Loose Tenons
Once your mortises are cut, it’s time to create your loose tenons. These are simple strips of wood cut to match the thickness of your router bit. Many short tenons can be cross-cut from a single piece of long stock. Stumpy Nubs notes that rounding the edges of the tenons with a router bit isn’t necessary. In fact, cutting the tenon stock slightly narrower than the mortise length allows for adjustments during assembly, making the process more forgiving.
And there you have it! With a simple router jig, you can achieve the same high-quality loose tenon joinery as a Festool Domino—without the hefty price tag.
The Secret to Superior Sanding: 3M Cubitron 2
While we’re on the topic of woodworking tools, let’s talk sandpaper. If you’ve ever been frustrated by sandpaper that clogs easily or wears out too quickly, you need to check out 3M Cubitron 2. This revolutionary sandpaper features ceramic pyramids that slice through wood fibers instead of plowing through them like traditional sandpaper. The result? Faster sanding, less heat, and a lifespan up to six times longer than cheap sandpaper.
Stumpy Nubs puts it best: “It just works better than any other sandpaper I’ve used.” Whether you’re a professional woodworker or a weekend DIYer, this sandpaper is a game-changer.
Join the iNthacity Community
Woodworking is more than just a hobby—it’s a journey of creativity, precision, and satisfaction. At iNthacity: the Shining City on the Web, we’re passionate about helping woodworkers of all skill levels achieve their dreams. Join our community to share your projects, learn from experts, and become part of something bigger.
So, what’s your next project? Are you ready to try loose tenon joinery with your router? Or maybe you’re curious to see if 3M Cubitron 2 lives up to the hype. Leave a comment below and let’s start a conversation. And don’t forget to like, share, and subscribe to iNthacity for more tips, tricks, and inspiration!

Wait! There's more...check out our gripping short story that continues the journey: The Router Jig Conspiracy

Disclaimer: This article may contain affiliate links. If you click on these links and make a purchase, we may receive a commission at no additional cost to you. Our recommendations and reviews are always independent and objective, aiming to provide you with the best information and resources.
Get Exclusive Stories, Photos, Art & Offers - Subscribe Today!
Related posts:
 Affordable Bosch PR20EVSK Router Table: Build a Budget-Friendly DIY Router Table for Free!
 The Beginner’s Guide to Woodworking Joinery
 Discover the Best Affordable Track Saw: DeWalt’s Game-Changing $100 Model Revolutionizes the Market!
 Must-Watch Guide: Safety Tips Before Letting Your Child Use DeWalt Tools or Any Brand
 This Little Wedge Creates the Strongest Wood Joint Ever for Ultimate Durability!


Post Comment
You must be logged in to post a comment.