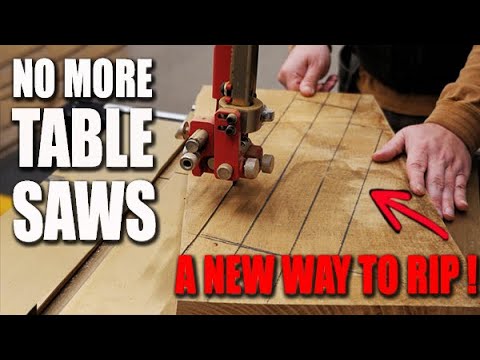
When you think of a band saw, you probably imagine it as the go-to tool for cutting curves. But what if I told you that it’s also a powerhouse for ripping straight lines? Yes, a band saw! James Hamilton, the mastermind behind the popular woodworking channel Stumpy Nubs, dives deep into this topic in one of his videos. And let me tell you, it’s a game-changer for anyone who loves woodworking. So, why would someone with a fancy table saw even consider using a band saw for ripping? Buckle up, because this article will blow your mind and make you rethink your woodworking habits.
When to Use a Band Saw Instead of a Table Saw
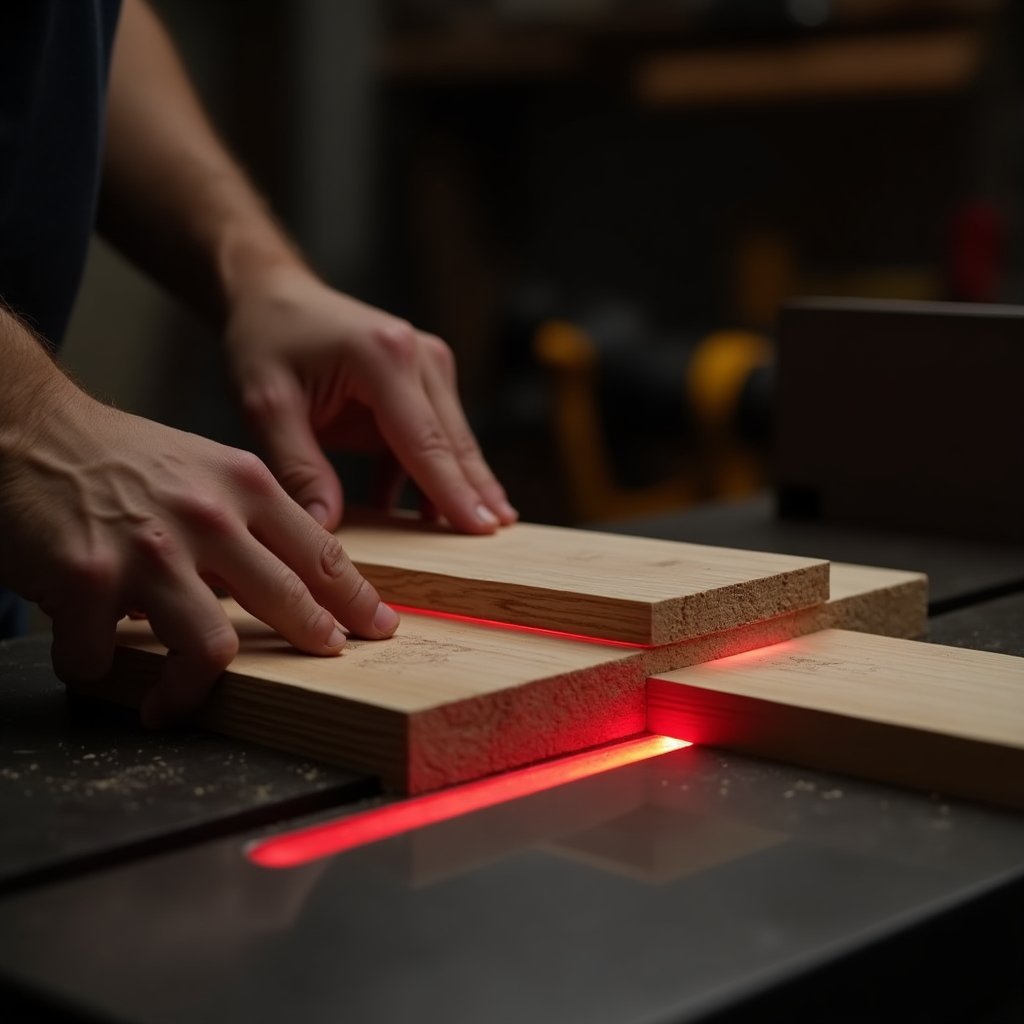
Let’s get one thing straight: your table saw is awesome. But there are times when a band saw is the better choice, especially when dealing with rough lumber. You know the kind—warped, cupped, or that questionable construction lumber you picked up from the Home Depot. These types of wood can be a nightmare on a table saw, increasing the risk of kickback. Why? Because the wood can shift or pinch against the spinning blade, sending it flying back at you like a scene from a horror movie.
A band saw, on the other hand, is much safer for cutting imperfect wood. Its blade is thinner and moves downward, pushing the wood toward the table instead of back at you. This downward motion eliminates the risk of kickback, making it a safer option for cutting wood that’s not perfectly straight or flat. So, if you’ve ever had a heart-stopping moment on a table saw, it might be time to give the band saw a shot.
Band Saw Blades: The Secret to Perfect Rips
The key to successful ripping on a band saw lies in the blade. First things first: it must be sharp. A dull blade will drift, making it nearly impossible to cut a straight line. You don’t necessarily need a brand-new blade, but if you're struggling to get a clean cut, it’s probably time for a sharpening session.
Next, consider the width of the blade. Wider blades are better suited for rip cuts—think of them like the rudder on a boat, guiding the cut straight through the wood. While it’s possible to rip with a narrow blade (James does it with a 1/4-inch blade in his video), a 1/2-inch or wider blade will give you the best results. If you’re serious about ripping, invest in a blade specifically designed for the task, like this 3-tooth-per-inch blade that’s ideal for thick hardwoods.
Blade Teeth: Less is More?
Believe it or not, fewer teeth on the blade can actually be a good thing. Fewer teeth mean larger gullets—the spaces between the teeth—which help clear dust out of the cut more effectively. The faster you clear the dust, the quicker the blade can cut, and the less heat it builds up. However, there’s a trade-off: fewer teeth can leave more marks on the wood. So, if you’re after a smoother finish, you might need to do a bit of sanding or use a jointer afterward.
Setting Up Your Band Saw: The Devil’s in the Details
Having the right blade is only half the battle. Proper setup is crucial for getting the best results. Here’s a checklist to ensure your band saw is ready to go:
- Blade Alignment: The blade should run down the center of the wheel, ensuring it’s well-supported and on a straight path during the cut.
- Tension: Follow your saw’s recommendations for proper blade tension. Too loose, and the blade will drift; too tight, and it might snap.
- Guides: Set the guides as close to the blade as possible without causing friction. This helps keep the blade steady during the cut.
- Table Alignment: Make sure your table isn’t tilted. A square table means square cuts.
- Outfeed Support: Don’t forget to provide support for long boards. You don’t want them sagging and throwing off your cut.
To Fence or Not to Fence? That is the Question
Freehand ripping is possible, but if you’re looking for precision and repeatability, a rip fence is your best friend. Most band saws come with a fence, but if yours doesn’t, you can purchase an aftermarket one or even make one from wood. The fence should be set parallel to the blade. Some folks adjust it to account for blade drift, but if your blade is sharp and properly set up, drift shouldn’t be an issue. If it is, spend some time tuning up your saw before resorting to adjusting the fence.
Pro Tip: Here’s a quick way to check for drift. Draw a line parallel to the edge of a piece of wood and freehand cut along it, trying to stay as straight as possible. If your blade drifts, angle the piece to compensate for the drift as you cut. Stop halfway, shut off the saw, and clamp the board in place. Adjust your fence to match the angle of the board, and you’re good to go.
The Art of the Cut: Speed and Consistency
When it comes to ripping on a band saw, patience is key. Don’t rush the cut—let the blade do the work. If you feed the wood too quickly, the blade’s teeth can clog with dust, causing the blade to drift off course. Likewise, inconsistent feeding speeds can lead to uneven cuts and more blade marks. It’s a delicate balance, but with practice, you’ll develop a feel for the right speed.
Speaking of blade marks, they’re inevitable when using a band saw. But don’t worry—they can usually be removed with a light pass over a jointer, a few swipes with a hand plane, or a bit of sanding. If you’re ripping multiple strips from one board, consider jointing or sanding the new edge after each cut. This ensures each subsequent cut is precise and reduces inconsistencies in width.
Why Not Just Use a Planer?
If you’re ripping multiple strips and want them all to be exactly the same width, there’s another option: rip them slightly wider than needed, then run them all through the planer. This ensures uniformity and saves you the headache of trying to match widths manually. It’s a handy trick for projects like making drawer fronts or cutting strips for a panel glue-up.
Safety First: Keep Those Fingers Intact
Band saws are safer than table saws in many respects, but that doesn’t mean you can be careless. Always keep the blade guard lowered and covering the blade. If you need to reach around the guard behind the saw, use a push stick to keep your fingers away from the blade, especially at the end of a cut. Safety should always be your top priority—no project is worth a trip to the ER.
Final Thoughts: The Band Saw vs. Table Saw Debate
While a band saw will never completely replace a table saw for ripping, it offers some undeniable advantages for specific tasks. It’s safer for cutting imperfect wood, allows for more precise positioning of project parts, and can handle cuts that aren’t parallel to an edge. Plus, with the right blade and setup, you can achieve clean, straight cuts that rival those of a table saw.
So, the next time you’re faced with a ripping task, consider reaching for your band saw. And if you’re looking for a reliable system to keep your tools razor-sharp, check out the M Power SPS Sharpening Station. It’s everything you need in one place, making sharpening a breeze.
Join the iNthacity Community
What’s your go-to tool for ripping? Have you ever tried using a band saw for straight cuts? Share your thoughts in the comments below! And if you’re not already part of the iNthacity community, what are you waiting for? Apply to become a permanent resident of the “Shining City on the Web”. Like, share, and join the debate—we can’t wait to hear from you!
Wait! There's more...check out our gripping short story that continues the journey: Elias Vex and the Echoes of Time

Disclaimer: This article may contain affiliate links. If you click on these links and make a purchase, we may receive a commission at no additional cost to you. Our recommendations and reviews are always independent and objective, aiming to provide you with the best information and resources.
Get Exclusive Stories, Photos, Art & Offers - Subscribe Today!
Related posts:
 Why the World HATES DeWalt and Other American Table Saws (Are They Actually Bad?)
 Watch a Table Saw Effortlessly Cut Through Wood and Send It Flying Through a Wall!
 When DeWalt Table Saw Safety Goes Too Far: Essential Tips and Insights
 Stop Using These Dangerous Table Saw Accessories Immediately – DeWalt, Bosch, and More Brands to Avoid
 12 Innovative Ways to Use Your Starrett Combination Square for Precision Tasks


Post Comment
You must be logged in to post a comment.