Every workshop needs a reliable way to hold things. You want a vice that’s fast and easy to clamp and unclamp, something that holds securely and works in all sorts of situations. Well, what if I told you that the perfect solution has been around for over 400 years? Yes, you read that right. This isn’t just any vice—it’s a design straight out of the 1600s, described by Joseph Moxon in his book The Art of Joinery. And today, we’re going to show you how to build this timeless tool using simple construction lumber and a bit of hardware.
This article is inspired by James Hamilton from Stumpy Nubs, who breaks down this fascinating project in one of his videos. Whether you’re a seasoned woodworker or a weekend DIYer, this vice is a game-changer. Let’s dive in!
Why This Vice Is a Must-Have for Your Workshop
So, what makes this Moxon-style vice so special? For starters, it’s incredibly versatile. You can fasten it to the front edge of your bench for a permanent setup, or use it as a portable vice that clamps onto any surface when needed. And here’s the kicker: it raises your workpiece, making it easier on your back and eyes. Who doesn’t want that?
But the real magic lies in its design. Unlike modern vices with screws or guides in the center, the Moxon twin-screw design allows a workpiece to pass through the jaws and extend toward the floor. This is a godsend for tasks like making boxes, cabinets, and drawers. It’s a design that has stood the test of time—because it just works.
What Makes This Build Different?
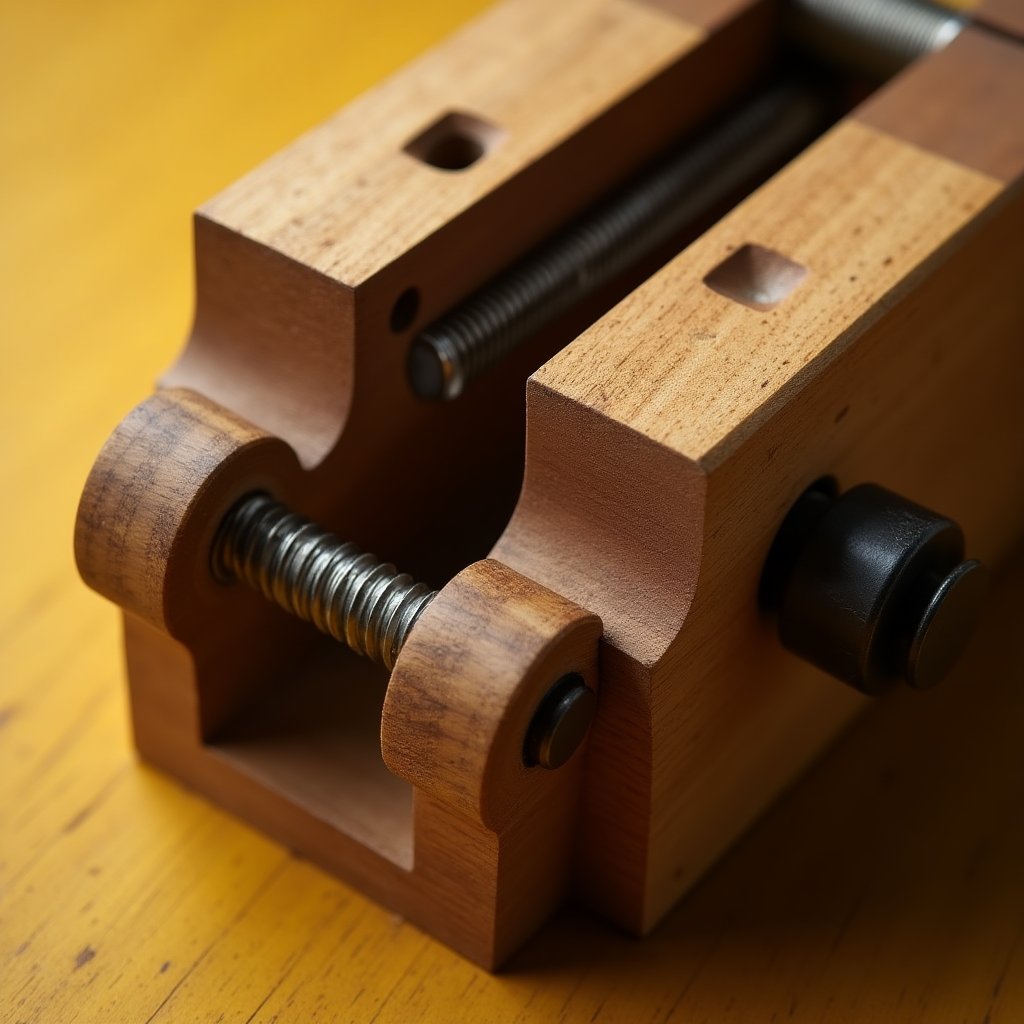
There are plenty of Moxon vice videos out there, but this one stands out. Why? Because it solves some key problems. Normally, the threaded rods are fixed to the back jaw and stick out past the front jaw, getting in the way when the vice is closed. The solution? Attach the handles permanently to the rods and screw them into the back jaw. But that creates another issue: aligning the embedded nuts in the back jaw for smooth operation.
This build solves that problem with a clever design involving square nuts and homemade flanges that allow everything to self-align. It’s simple, inexpensive, and downright brilliant. You’ll wonder why you didn’t build one sooner.
Step-by-Step Guide to Building Your Moxon Vice
Ready to get started? Here’s what you’ll need:
- Plans: Download the free detailed plans. They’re packed with step-by-step instructions, photos, and drawings. Trust me, they’ll make your life easier.
- Hardware: You’ll need two 8-inch pieces of 3/4-inch threaded rod, two square nuts, two washers, two bushings, and two crank handles. You can assemble these yourself or grab a pre-made kit for convenience.
- Wood: A few pieces of construction lumber will do the trick. Nothing fancy required.
Got everything? Great. Let’s walk through the highlights of the build:
Key Steps to Build Your Vice
First, cut your lumber to the dimensions specified in the plans. Most of the holes are straightforward, but you’ll notice two are elongated. These are created by boring two holes next to each other and chiseling out the waist in between. This prevents the jaw from binding on the main screws.
Next, press the bushings into another set of holes and mount homemade flanges on the other side. These flanges are simple to make—just bore four small screw holes in each corner and a large hole through the center. Then, use a table saw or router table to create a groove for the square nut. Gradually widen the groove until the nut slips inside with a little room to spare.
Attach the flanges over the bushing holes with screws, and consider adding cork rubber to the jaws for added grip and to prevent marring your workpieces. Finally, assemble the vice by attaching the crank handles to the threaded rods with epoxy or threadlock.
That’s it! You’ve just built a 400-year-old invention that will revolutionize your workshop. Feels like cheating, doesn’t it?
Why You Should Grab a Hardware Kit
While you can source the hardware yourself, I highly recommend using this pre-made kit. It includes everything you need, including those nice cast iron cranks. Plus, it’s assembled by a small family business in Missouri—supporting small businesses is always a win. Just a heads-up: these kits tend to sell out fast, so grab one while you can. If they’re out of stock, get on the waitlist. You’ll thank me later.
Bonus Tip: Cork Rubber
Adding cork rubber to your vice jaws is a small detail that makes a big difference. It’s durable, adhesive-backed, and prevents your workpieces from getting marred. I’ll link to it below so you can grab some for your build.
Watch the Original Video for Full Details

Final Thoughts: Why This Vice Is Worth Your Time
Building this Moxon vice is more than just a woodworking project—it’s a connection to history. You’re replicating a design that has been used by craftsmen for centuries. And let’s be honest, it’s also a conversation starter. Imagine showing off your workshop and casually mentioning, “Oh, that vice? It’s based on a 400-year-old design.” Instant woodworking cred.
So, what are you waiting for? Build one this weekend. Your back, your eyes, and your future self will thank you.
Join the iNthacity Community
Loved this project? Want more tips, tricks, and inspiration? Join the iNthacity community and become a part of the "Shining City on the Web." Share your thoughts, ask questions, and let’s keep the conversation going. Like, share, and comment below—we’d love to hear how your Moxon vice turns out!
Thought-Provoking Questions for You
- What’s your favorite historical woodworking tool or technique?
- How has your workshop evolved over the years?
- What’s one project that changed the way you work?
Let’s talk woodworking, and let’s build something amazing together.
Wait! There's more...check out our gripping short story that continues the journey: The Moxon Vice

Disclaimer: This article may contain affiliate links. If you click on these links and make a purchase, we may receive a commission at no additional cost to you. Our recommendations and reviews are always independent and objective, aiming to provide you with the best information and resources.
Get Exclusive Stories, Photos, Art & Offers - Subscribe Today!
Related posts:
 Never Worry About Woodworking Clamps Again with DeWalt’s Top Tools and Tips
 Watch a Table Saw Effortlessly Cut Through Wood and Send It Flying Through a Wall!
 10 Ways to Get BANNED from a Woodworking Shop Forever: Avoid These Mistakes with DeWalt Tools
 Discover Why Vernier Scales by [Brand Name] Are AMAZING Precision Tools!
 Must-Watch Guide: Safety Tips Before Letting Your Child Use DeWalt Tools or Any Brand


Post Comment
You must be logged in to post a comment.